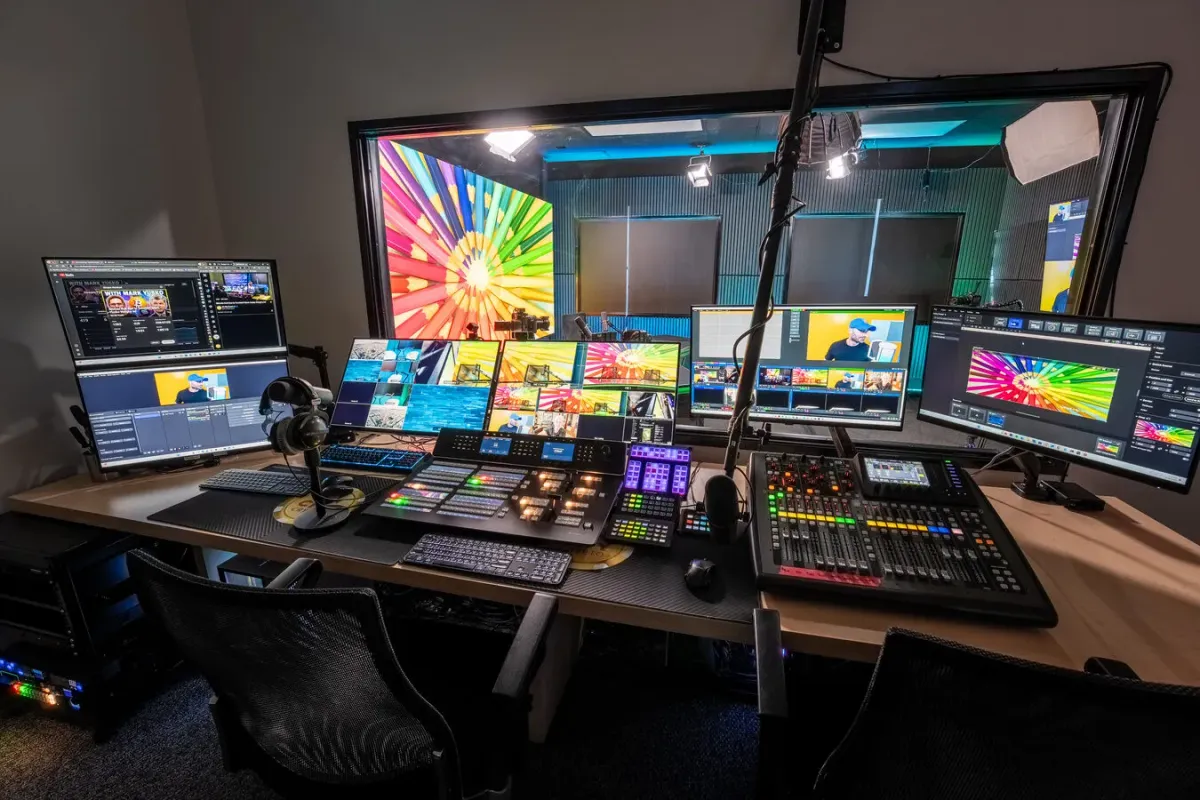
Setting up a podcast studio is really about solving three problems in the right order: making the room sound good, getting the gear working together, and making it look like a real show on camera. Most guides drown you in gear lists and skip the two things that actually decide whether your studio feels professional. We build and run three studios in Las Vegas, so this guide walks through how to set up a podcast studio the way we actually do it, with real photos of our rooms so you can see what each choice looks like instead of just reading about it.
Table of contents
- Start with the right space
- Acoustic treatment comes before gear
- The core podcast equipment
- Microphone and audio setup
- Lighting setup
- Camera setup for video
- Your background and backdrop
- Podcast recording and editing software
- Podcast room setup ideas
- Test everything before you record
- How much does it cost to set up a podcast studio?
- When to skip the build and book a room
- FAQ
The short version, before the detail: pick a small, quiet room, treat it so it does not echo, get one good microphone per person plus headphones, add lights and a camera if you are doing video, and choose a background that looks intentional. Everything below is how to do each of those well.
START WITH THE RIGHT SPACE
Your room matters more than your microphone. A great mic in a bad room still sounds bad, and no amount of gear fixes a space that echoes. So the first move in any podcast setup is choosing where you record.
PICK A SMALL ROOM OVER A BIG ONE
Big empty rooms bounce sound around and create echo. Small rooms with soft stuff in them absorb it. A spare bedroom or a converted office beats a large open living room almost every time. If you only have a big space, record in one corner and bring the soft surfaces in close.
WHAT TO LOOK FOR AND WHAT TO AVOID
Look for carpet, curtains, a couch, or anything soft that soaks up sound. Avoid hard floors, bare walls, big windows, and rooms next to noisy streets or loud AC units. Here in Las Vegas the constant AC and street noise makes this a real factor, so a quiet interior room is worth more than a pretty one with a view.
ACOUSTIC TREATMENT COMES BEFORE GEAR
This is the step beginners skip and pros obsess over. Acoustic treatment is not the same as soundproofing, and confusing the two wastes money.
SOUNDPROOFING VS ACOUSTIC TREATMENT
Soundproofing stops noise from getting in or out, and it is expensive and rarely necessary for a podcast. Acoustic treatment shapes the sound inside the room so your voice is clear and there is no echo. Treatment is what you actually want, and it is cheap. Focus your budget here, not on soundproofing.
CHEAP ACOUSTIC TREATMENT THAT WORKS
You do not need a fully padded room. A few well-placed absorbers make a huge difference:
- Foam or fabric acoustic panels on the walls nearest the mics
- A thick rug on a hard floor
- Curtains over windows and bare walls
- Bookshelves full of books, which scatter sound nicely
- A closet full of clothes as an emergency vocal booth
Treat the first reflection points, the spots on the walls and ceiling where sound bounces straight from your mouth to the mic, and you fix most of the problem for very little money.
THE CORE PODCAST EQUIPMENT
Once the room is handled, the gear is simple. Here is the podcast equipment that actually matters, and nothing you do not need. If you want the full budget-by-budget breakdown, our podcast equipment guide goes deeper.
MICROPHONES
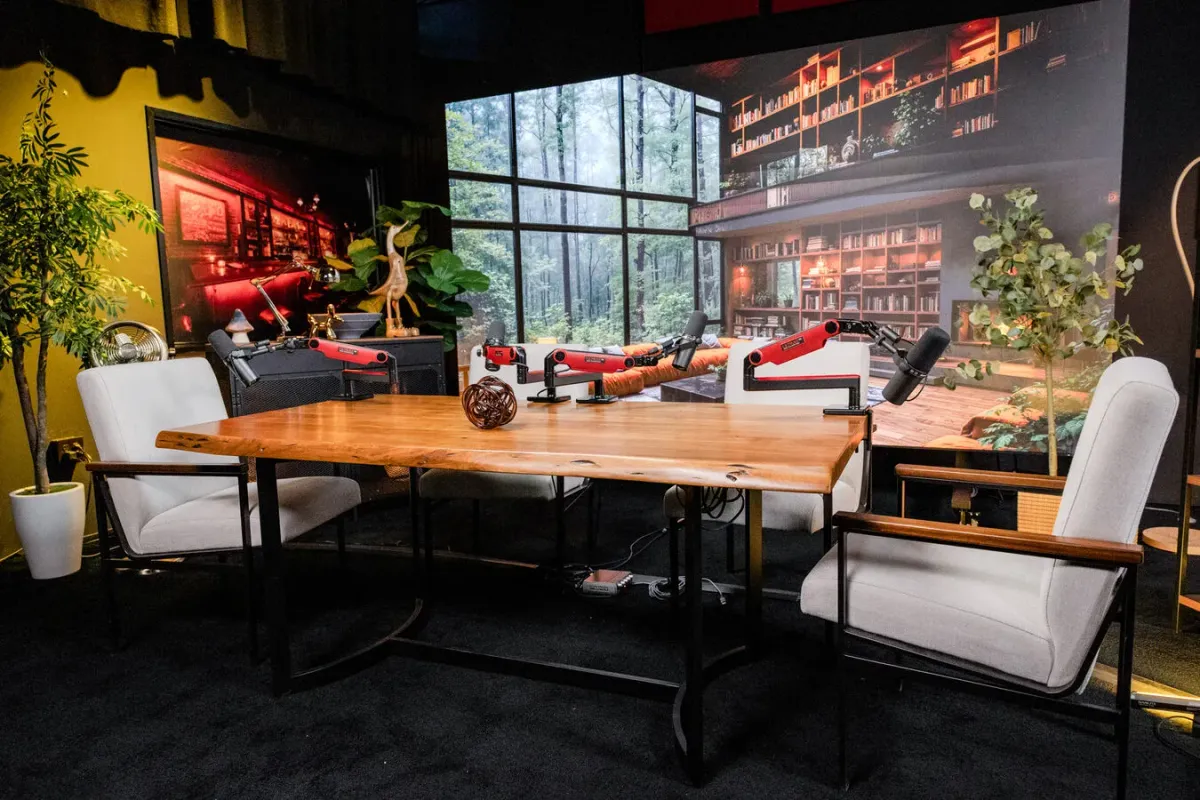
Get one microphone per person. For most rooms, a dynamic mic is the right call because it rejects background noise, which matters a lot if your treatment is not perfect. A USB dynamic mic is the simplest start, and XLR mics are the step up once you have multiple people.
AUDIO INTERFACE OR MIXER
If you use USB mics, you can skip this. Once you move to XLR mics, you need either an audio interface (for one or two mics) or a mixer (for three or more people and live control). Match it to how many people are in the room.
HEADPHONES AND ACCESSORIES
Every person needs wired headphones so they can hear what the mic hears. Add a boom arm to hold each mic at mouth height and a pop filter to soften hard consonants. These small pieces make a bigger difference than most people expect.
MICROPHONE AND AUDIO SETUP
Owning the gear is not the same as setting it up right. Your microphone setup and overall audio setup are where good recordings are won or lost.
Position each mic about a fist away from the mouth and slightly off to the side, so breath and plosives do not hit it straight on. Set your input levels so your voice peaks in the healthy middle range, never slamming into the red, because clipping cannot be fixed later. Record each person on a separate track whenever you can, since separate tracks let you fix one person's audio without touching anyone else. And always monitor through headphones while recording so you catch a problem in the moment instead of discovering it afterward.
LIGHTING SETUP
If your podcast is video, and in 2026 it probably should be, lighting matters more than your camera. A good lighting setup makes a cheap camera look great, and bad lighting makes an expensive one look amateur. The classic approach uses three lights, and you can start with just the first and add the others as you go.
THE KEY LIGHT
This is your main light and the one that does most of the work. Place it in front of you and slightly to one side, angled down toward your face. Soft, diffused light through a softbox or diffuser is far more flattering than a harsh bare bulb. If you only buy one light, buy this one and get it right.
THE FILL LIGHT
The key light creates shadows on one side of your face. The fill light sits on the opposite side, dimmer than the key, to soften those shadows without flattening them out completely. A little shadow gives your face shape, so the fill should support the key, not overpower it.
THE BACK LIGHT
Placed behind and above you, the back light separates you from the background and adds a sense of depth, so you do not blend into the wall behind you. It is the finishing touch that makes a shot look intentional rather than flat.
CAMERA SETUP FOR VIDEO
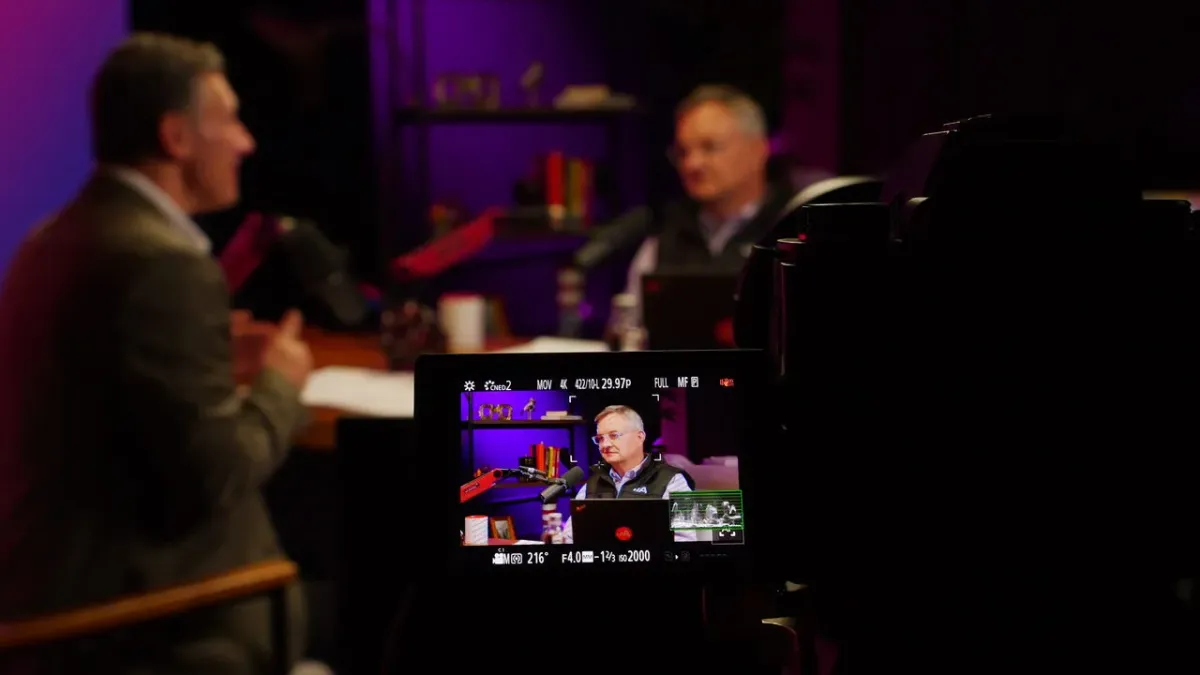
For video, you have three tiers. A quality webcam is a fine start. A mirrorless or DSLR camera is a big jump in quality once you are ready. And a multi-camera setup, like the several 4K angles we run in our rooms, is what makes a show look truly professional, because cutting between angles keeps a long episode visually alive.
Whatever camera you use, put it at eye level, frame yourself with a little headroom, and make sure your lighting is doing its job first. A single well-lit camera beats three badly-lit ones.
YOUR BACKGROUND AND BACKDROP
Here is the part almost every home setup gets wrong and the part that instantly separates a real show from a hobby: what is behind you. A cluttered bedroom or a blank wall tells viewers this is not serious. An intentional background tells them it is.
You have a few options, from simple to professional, and any of them beats a blank wall or a messy room.
A STYLED SET
The most accessible option. Arrange bookshelves, plants, a neon sign, framed art, or branded décor behind you, with some depth so it does not look flat against the wall. The goal is a background that looks deliberate and matches the tone of your show. This costs the least and, done well, looks genuinely professional.
A BRANDED BACKDROP
A printed banner or a wall with your show logo gives you a clean, consistent look every single episode, and it quietly reinforces your brand in every clip and thumbnail. It is a small investment that makes a new show look established.
AN LED WALL
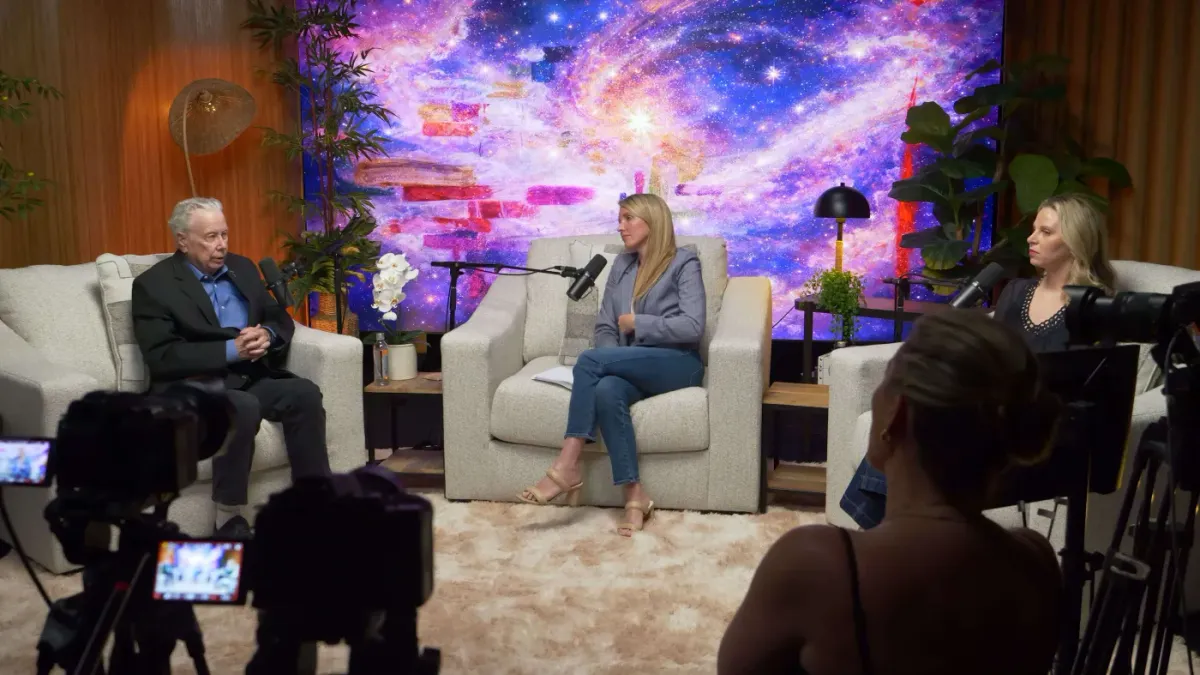
The top tier, and the one that changes everything. An LED wall is a giant screen behind you that can display any scene, brand, or mood you want. One physical room becomes unlimited backgrounds. Here is the same kind of room showing completely different looks, a galaxy, a scenic outdoor backdrop, and a cozy fireplace, just by changing what is on the wall:
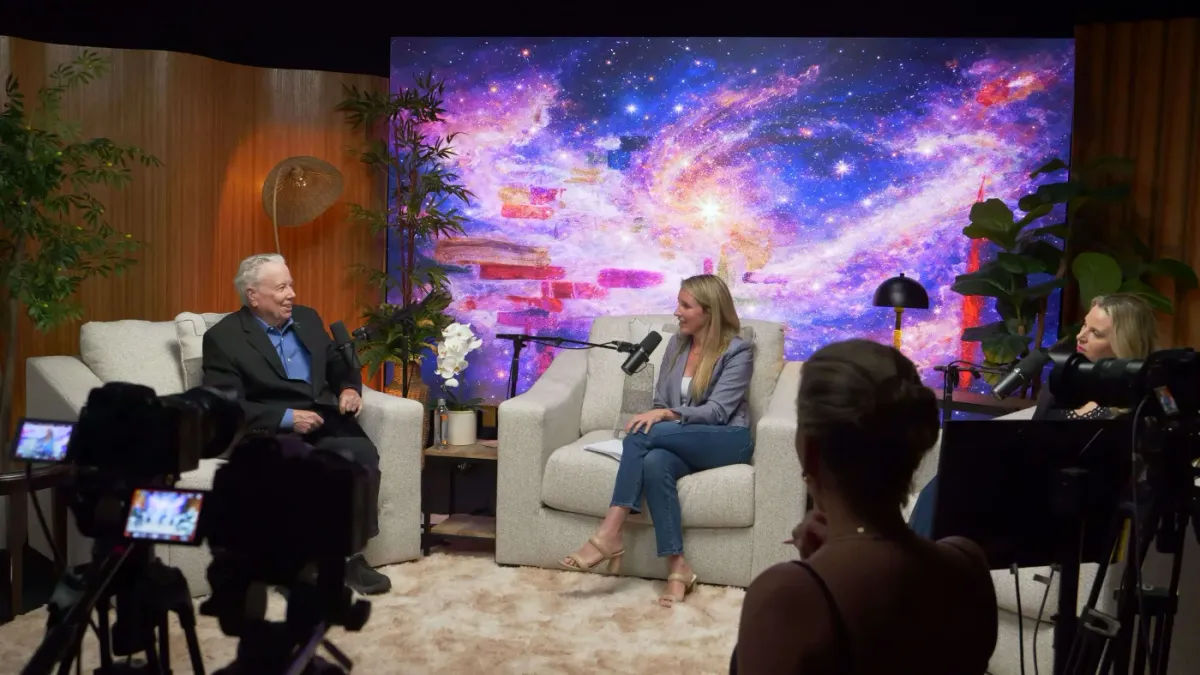
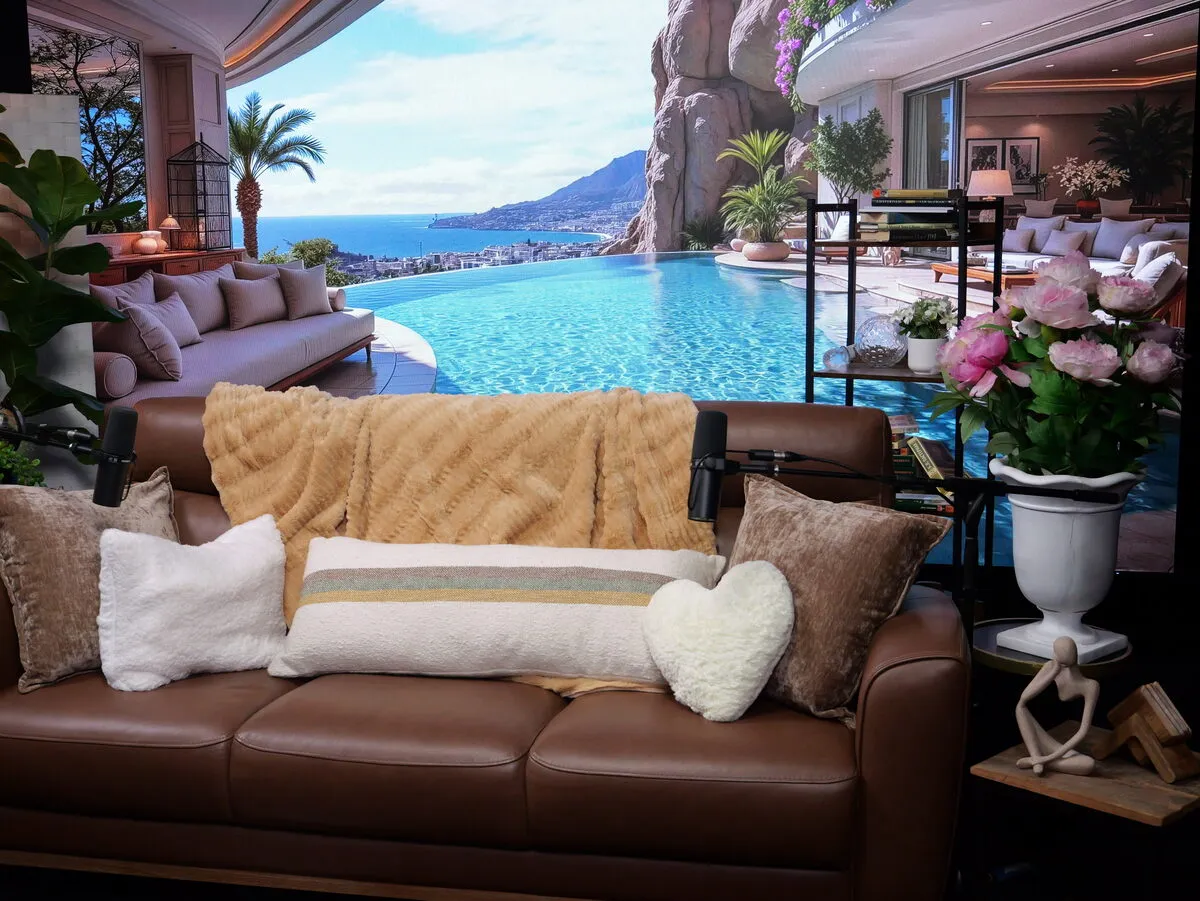
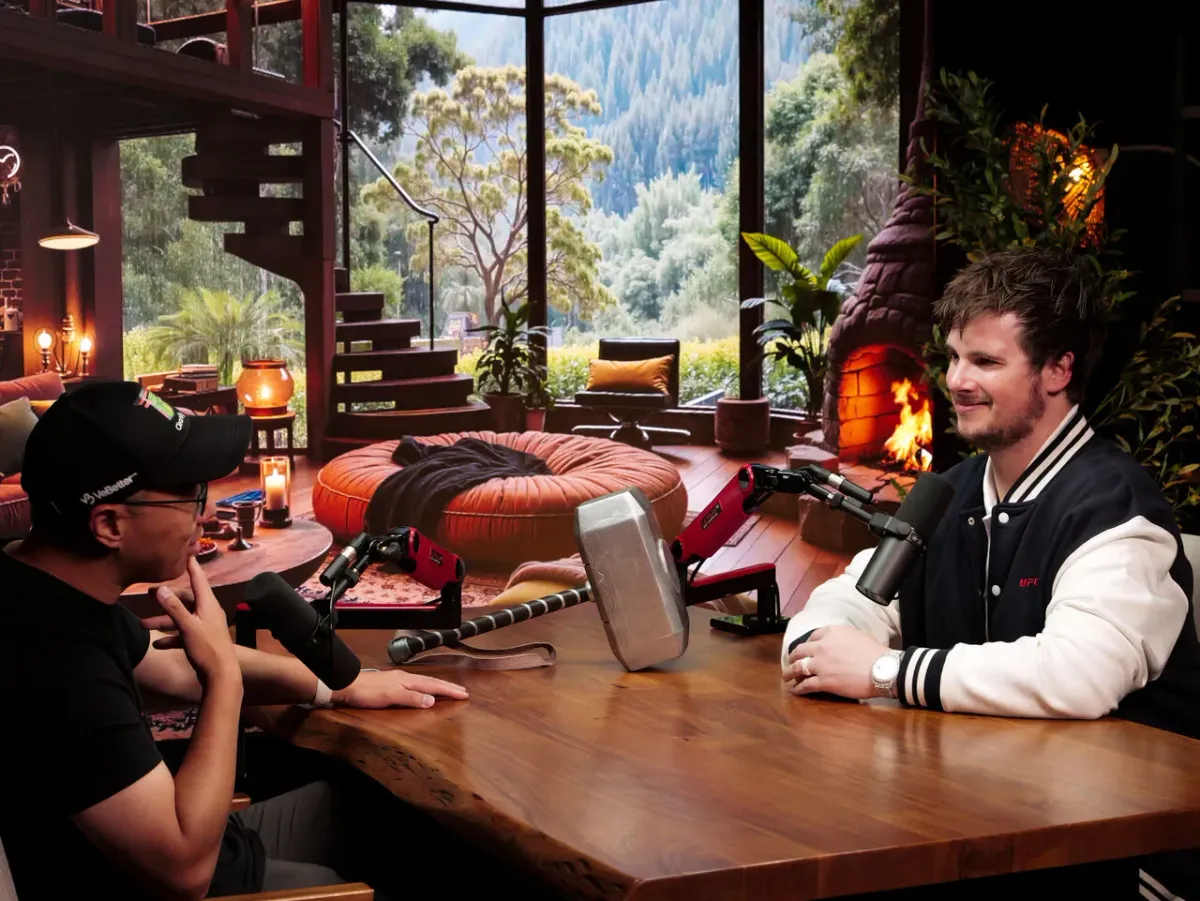
That flexibility is impossible to fake at home, and it is why serious shows either build a strong fixed backdrop or record somewhere that already has this. Whatever you choose, keep some distance between you and the background so it does not look flat, and light it separately from yourself for depth.
PODCAST RECORDING AND EDITING SOFTWARE
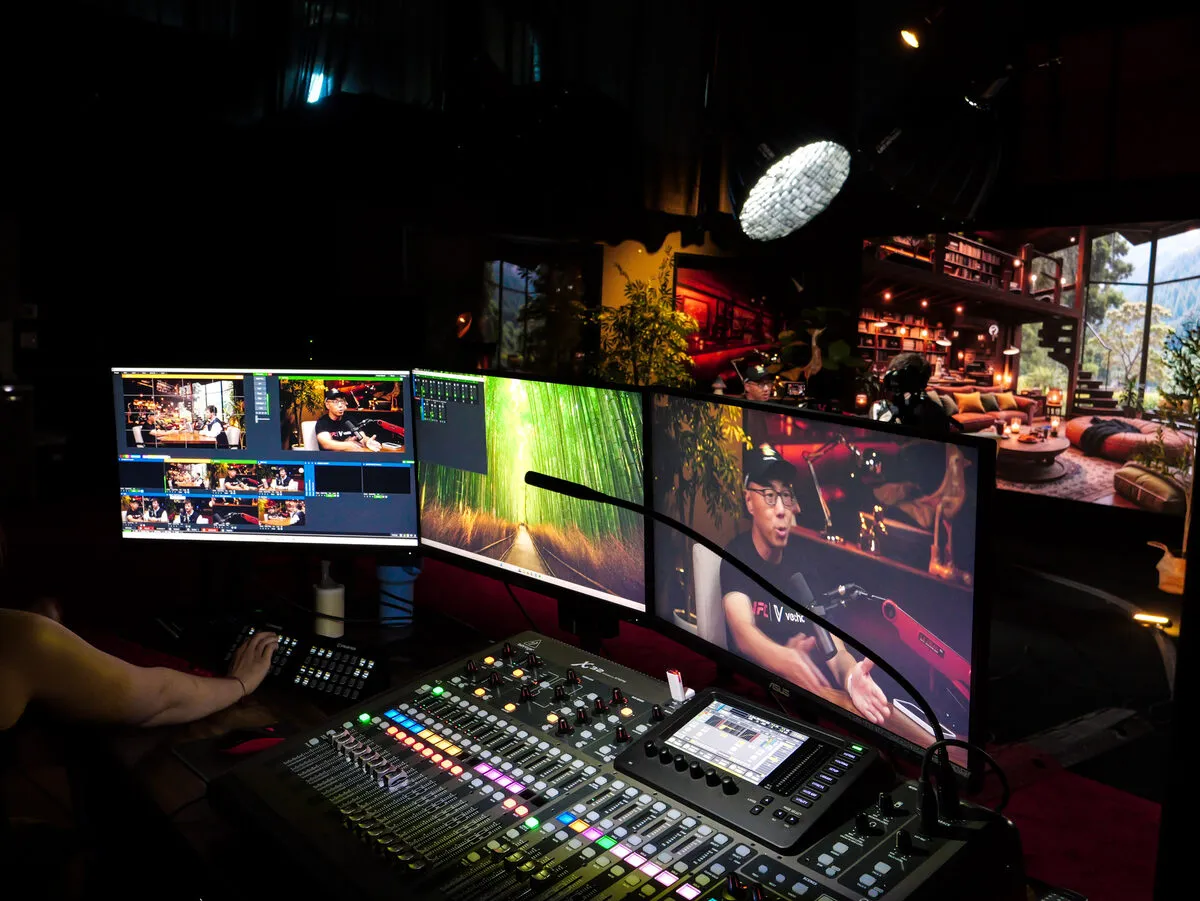
Your software is where the audio and video land and get finished. For podcast recording, free tools like Audacity or GarageBand handle audio for most shows, and video editors range from free options to full professional suites. If you record remote guests, use a platform that records each person locally so a shaky connection does not ruin the audio. Modern AI cleanup tools can also reduce background noise and enhance voices in one pass, which is a real help when your room treatment is not perfect. Start with free software, learn the basics of cutting and leveling, and upgrade only when something is genuinely holding you back.
PODCAST ROOM SETUP IDEAS
The right room setup depends on your show. Here are three real configurations and who each one fits.
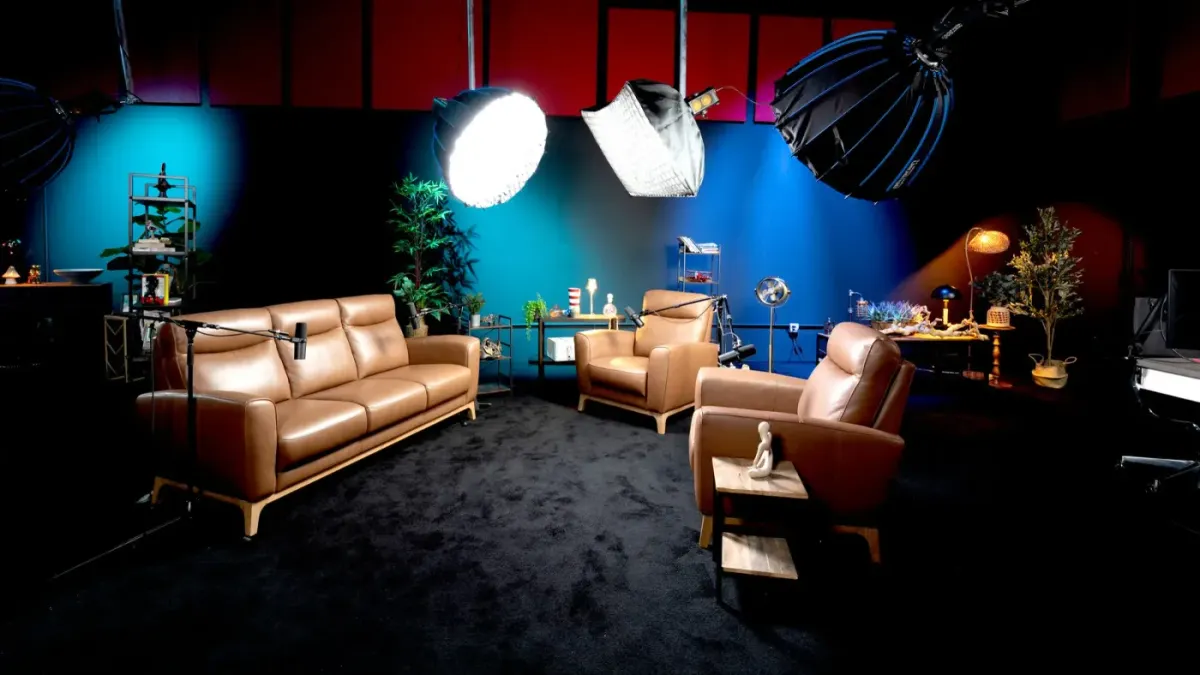
THE SMALL SOLO OR TWO-PERSON ROOM
Tight, controlled, and simple. One or two mics, a clean backdrop, one or two cameras, and treatment on the near walls. This is the most common and the easiest to make sound great, because a small treated room is forgiving.
THE MULTI-HOST ROUNDTABLE
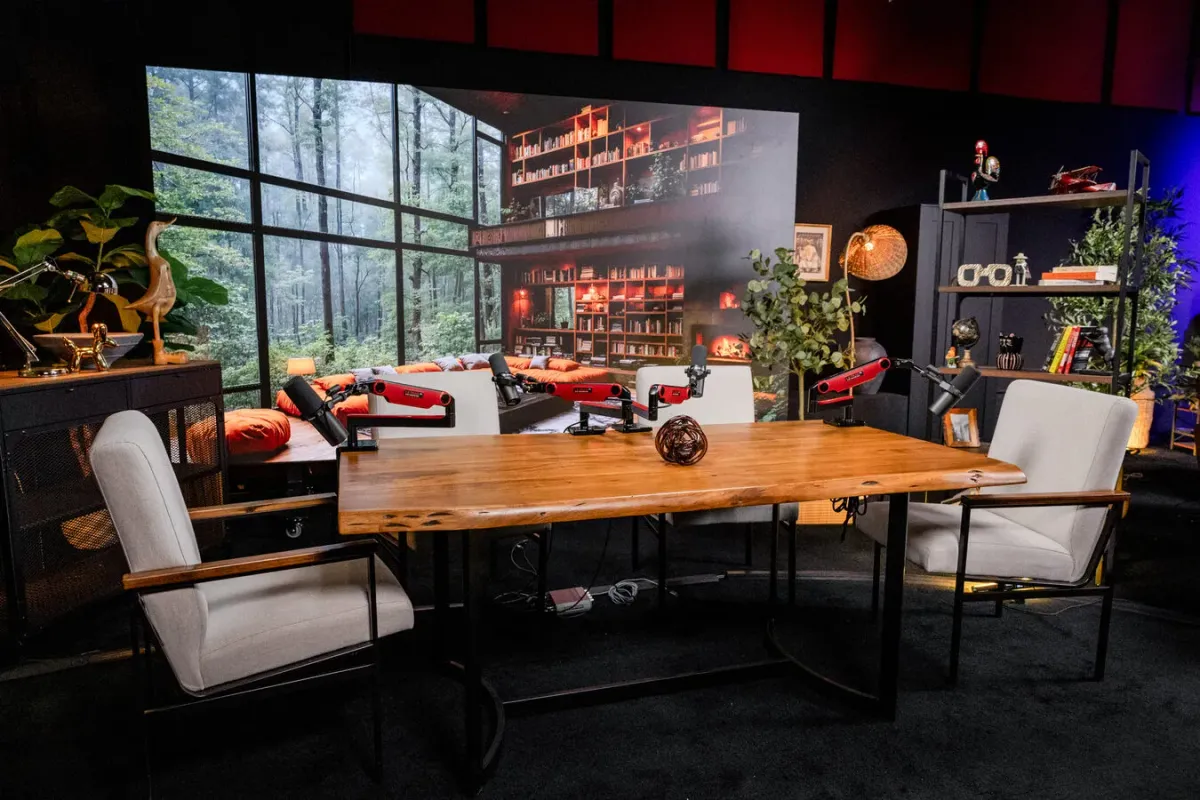
For panels and group shows, you need a table that seats everyone with a mic each, cameras that can catch every face, and a wide backdrop behind the whole group. The layout has to give each person room without pushing anyone out of frame.
THE VIDEO-FIRST BRANDED SET
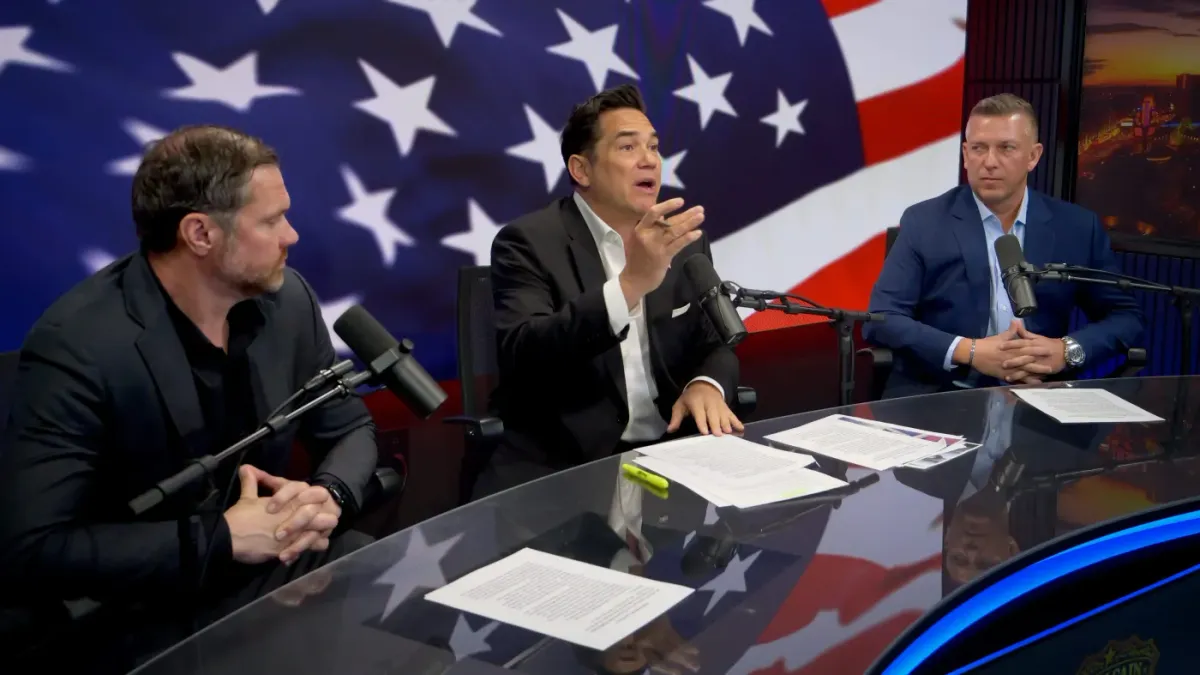
If clips and YouTube drive your show, the set itself becomes part of the brand. A bold, recognizable background that reads instantly in a thumbnail, strong lighting, and multiple camera angles. This is the setup built to be watched, not just heard.
TEST EVERYTHING BEFORE YOU RECORD
Before your first real episode, do a full dry run. This ten-minute habit saves entire recordings. Record a short test with everyone talking at a normal volume, then listen back on headphones for hum, echo, popping, or one person being much louder than the rest. Check that every mic is on its own track and actually capturing. If you are doing video, watch the playback for lighting shadows, focus, and anything distracting in the background. Fix what you find now, because catching a dead mic or a buzzing light in a test is a minor annoyance, and catching it after a great 60-minute conversation is a disaster. Once the test sounds and looks clean, you are ready to record for real.
HOW MUCH DOES IT COST TO SET UP A PODCAST STUDIO?
Costs land in three tiers, and honesty helps here:
- Basic audio setup: about $150 to $400 for a mic, headphones, and simple treatment. Enough to sound professional on audio.
- Serious home studio: roughly $1,500 to $4,000 once you add better mics, an interface, lighting, a camera, and a real backdrop.
- Professional build: $10,000 and well up for a fully treated, multi-camera, LED-wall room like the ones we run.
The jump from tier two to tier three is steep, and it is not just money. It is the hours spent learning acoustics, lighting, and multi-camera switching, plus the ongoing upkeep. For a full cost breakdown, see our podcast studio cost guide.
WHEN TO SKIP THE BUILD AND BOOK A ROOM
Building your own makes sense if you record constantly, enjoy the technical side, and want a permanent space of your own. But for a lot of people, especially anyone doing video or recording guests, the math favors booking a room that already has all of it dialed in.
A professional studio gives you the treated room, the mics, the lighting, the cameras, the LED backdrops, and an engineer, with zero setup and zero learning curve. If you are weighing that against building your own, our studio versus home recording breakdown lays out the real tradeoffs. Sometimes the smartest studio setup is the one you do not have to build.
FREQUENTLY ASKED QUESTIONS
HOW MUCH DOES IT COST TO SET UP A PODCAST STUDIO?
A basic audio setup runs about $150 to $400, a serious home studio with video is roughly $1,500 to $4,000, and a fully professional multi-camera room with acoustic treatment and an LED wall is $10,000 and up. Most people should start small and upgrade the pieces that hold them back.
WHAT IS NEEDED TO SET UP A PODCAST STUDIO?
At minimum, a quiet treated room, one microphone per person, wired headphones, and recording software. For video, add lighting, a camera, and an intentional background. The room and its acoustic treatment matter as much as any single piece of gear.
DO I NEED TO SOUNDPROOF MY PODCAST STUDIO?
Usually not. Soundproofing stops noise from traveling and is expensive. What you actually want is acoustic treatment, which shapes the sound inside the room and is far cheaper. Treat your first reflection points and you solve most audio problems.
DO I NEED AN LLC TO START A PODCAST?
No. You do not need an LLC or any business structure to set up a studio and start recording. Some hosts form one later for tax or liability reasons once the show earns money, but it has nothing to do with the studio setup itself.
IS IT WORTH BUILDING A HOME PODCAST STUDIO?
It is worth it if you record often, want a permanent space, and enjoy managing the technical side. If you mainly do video, record guests, or would rather not learn acoustics and lighting, booking a professional room is often the better use of money and time.
WANT TO SEE A FULLY BUILT PROFESSIONAL SETUP BEFORE YOU SPEND A DOLLAR?
Book a free tour of our Las Vegas studios and walk through Studio 5, The Roundtable, and The Lounge in person.
BOOK YOUR FREE STUDIO TOUR